Run Microsoft Windows on an Intel-based Mac computer.
Boot Camp enables you to install Windows on your Intel-based Mac computer, using a
Microsoft Windows install disc that you provide. Windows is installed on its own
partition. After installation, you can use either Windows or Mac OS X on your Mac
computer.
Here are the steps required to install Windows XP on a Mac:
Step 1: Download Mac OS X v10.4.6 (or later) and latest firmware update from Apple Download website.
Step 2: Run the Boot Camp Assistant to create a Macintosh Drivers CD or DVD.
Step 3: Create a new hard-disk partition [minimum size, 5GB] to make room for Windows XP. All the software and data on the original Mac partition stays intact.

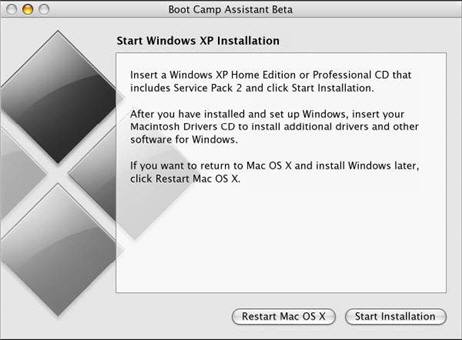
Step 4: Insert your Windows XP CD and start the XP installation. Select Partition C: and format the partition using either NTFS or FAT file formats. Though NTFS is more secure than FAT, you won't be able to write or save files to the Windows volume from Mac OS X.
Step 5. Once XP install process is complete, Boot Camp will restart your system in Windows XP automatically. Now is the turn to install Mac Drivers from the Macintosh Drivers CD that you created in Step 2. Restart.
This is an optional step. You can change the Startup Disk preferences page to choose which OS to boot by default. The default OS can also been changed from Windows Control Panel - Performance and Maintenance - Startup Disk.Change the Operating system and Restart.
At startup, hold down the option key (alt) to choose between Mac OS X and Windows.
More Resources on Apple Website:
Apple Boot Camp Homepage | Download Boot Camp - Windows XP Drivers Update 2.1 [Direct Link]
Download Apple Firmware Update | Mac OS X 10.4.6 for Intel update
Boot Camp Guide
Boot Camp enables you to install Windows on your Intel-based Mac computer, using a
Microsoft Windows install disc that you provide. Windows is installed on its own
partition. After installation, you can use either Windows or Mac OS X on your Mac
computer.
Here are the steps required to install Windows XP on a Mac:
Step 1: Download Mac OS X v10.4.6 (or later) and latest firmware update from Apple Download website.
Step 2: Run the Boot Camp Assistant to create a Macintosh Drivers CD or DVD.
Step 3: Create a new hard-disk partition [minimum size, 5GB] to make room for Windows XP. All the software and data on the original Mac partition stays intact.

Step 4: Insert your Windows XP CD and start the XP installation. Select Partition C: and format the partition using either NTFS or FAT file formats. Though NTFS is more secure than FAT, you won't be able to write or save files to the Windows volume from Mac OS X.
Step 5. Once XP install process is complete, Boot Camp will restart your system in Windows XP automatically. Now is the turn to install Mac Drivers from the Macintosh Drivers CD that you created in Step 2. Restart.
This is an optional step. You can change the Startup Disk preferences page to choose which OS to boot by default. The default OS can also been changed from Windows Control Panel - Performance and Maintenance - Startup Disk.Change the Operating system and Restart.
At startup, hold down the option key (alt) to choose between Mac OS X and Windows.
More Resources on Apple Website:
Apple Boot Camp Homepage | Download Boot Camp - Windows XP Drivers Update 2.1 [Direct Link]
Download Apple Firmware Update | Mac OS X 10.4.6 for Intel update
Boot Camp Guide
Comments